
Editing Receipts, Date Due Slips, Hold Slips, etc.
Using the Manager Login, you can edit what displays on your Payment Receipts, Hold Slips, Checkout Receipts, Transit Slips, Credit Receipts and Date Due Slips. To edit them, you will have to edit the Properties of the Wizard generating the slip or receipt. The changes made will only be saved to that certain workstation. On the final pages of this document, you will find a list of each type of receipt and slip and where they are located in WorkFlows.
To edit the receipt or slip setup please follow the steps below:
For this example, we will set up the Checkout Wizard, Charge Receipt (Checkout).
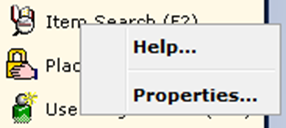
- Right click on the icon or name of the wizard you wish to edit.
- Click Properties.
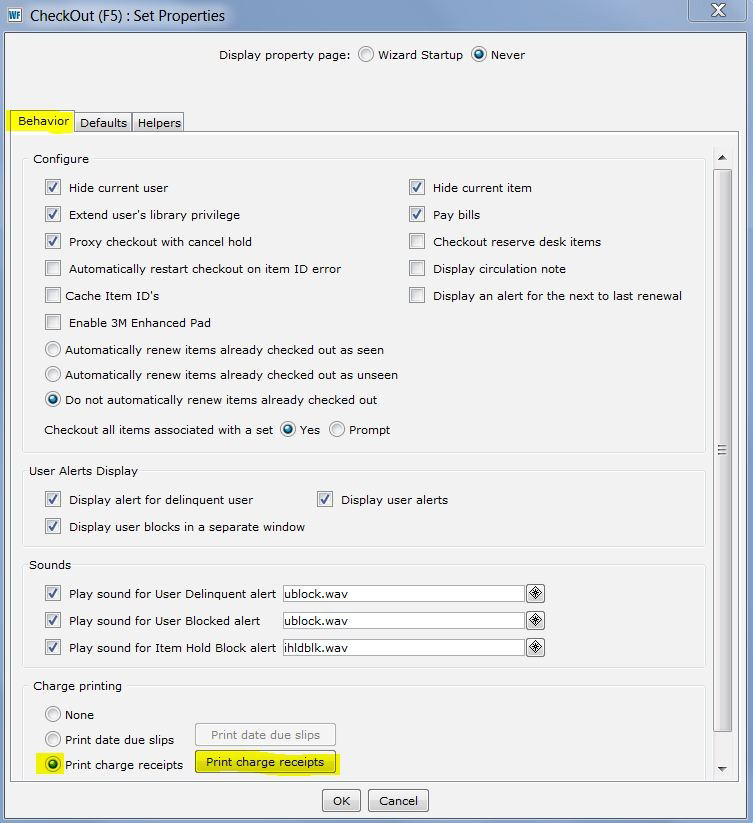
- Click on the Behavior Tab.
- Click on the radio button next to Print Charge Receipts.
- Click the Print Charge Receipts Button.
Editing Receipts, Date Due Slips, Hold Slips, etc.
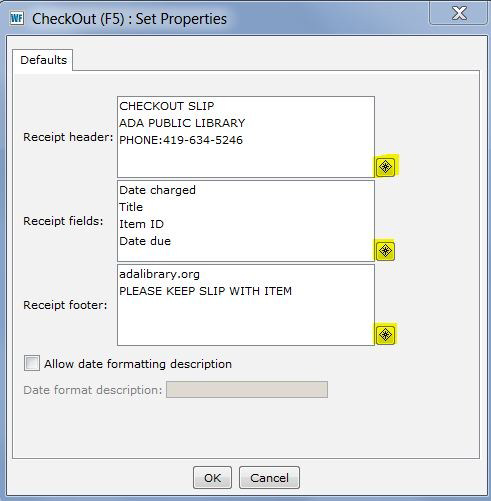
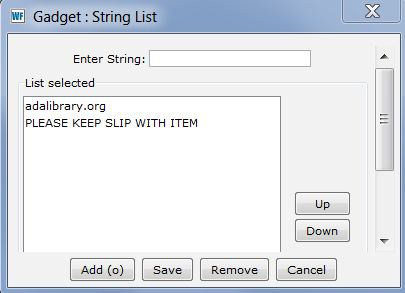
- To edit the Header, Fields, and Footer of the receipt, you must click on each gadget respectively to add or choose your criteria.
- To edit the Receipt Header, click on the gadget to the right.
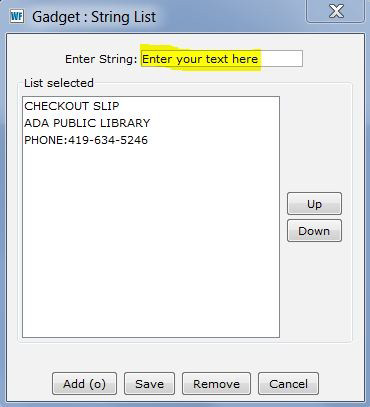
- Enter your text in the Enter String box.
- Click the Add button on the bottom of the window to move the text down to the list.
- To reorder the lines, highlight the line/text and use the Up or Down buttons.
- Click Save when you are finished.
Editing Receipts, Date Due Slips, Hold Slips, etc.
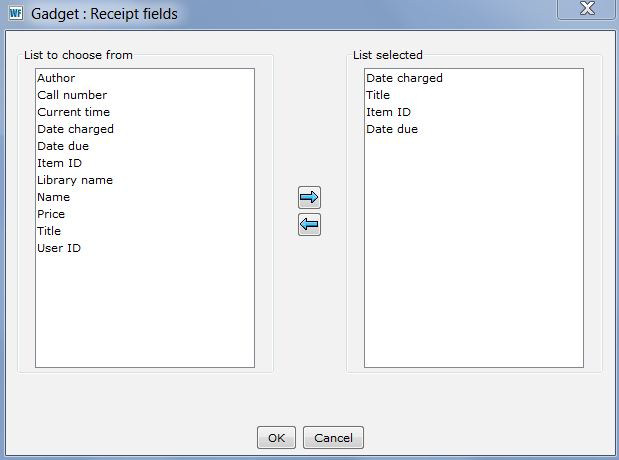
- To edit the Receipt Fields, click on the gadget to the right. Using this gadget, you will select what you wish to display in the body of the receipt and in what order.
- Click on your selection in the left column and move it to the List Selected using the arrows in the middle of the window.
Note: We cannot add any criteria to the "List to Choose From" column. And, it is helpful to know ahead of time what you want printed on the receipt and the order. This gadget doesn't respond well when you try to move lines back and forth. Doing so will reorder the lines different from what you have chosen.
- To edit the Receipt Footer, click on the gadget to the right.
- Enter your text in the Enter String box.
- Click the Add button on the bottom of the window to move the text down to the list.
- To reorder the lines, highlight the line/text and use the Up or Down buttons.
- Click Save when you are finished editing the Footer.
- Click OK to save your receipt changes.
Editing Receipts, Date Due Slips, Hold Slips, etc.
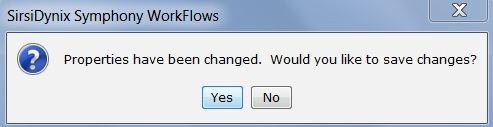
- The changes will appear immediately on that workstation. However if you want to keep the defaults, you must save the changes to your workstation. When you close WorkFlows, the message seen below will appear. Click Yes and the changes you made will be saved to your workstation.
Note:Listed below are Wizards where Checkout Slips, Hold Slips, Payment Receipts, Date Due Slips, Transit Slips, and Credit Receipts will need to be edited. The slips and receipts can be found in each Wizard Properties Window in either the Behavior or Helper Tabs. Changing the display in one wizard, will not populate or copy the same display in another wizard. You must change each wizard property. For example, if you want the same information to display every time a date due slip is printed, you will need to edit each wizard that prints a date due slip.
Wizards Where There are Checkout Slips-
- Checkout
- In the Offline Module: Offline Charge Item
Wizards Where There Are Hold Slips-
- Check Item Status
- Checkin
- Bookdrop Checkin
- Fine Free Checkin
- Onshelf Items
- Remove User Hold
- Trap Holds
Wizards Where There are Date Due Slips-
- Checkout
- Renew Item
- Renew User
- In the Offline Module: Offline Charge Item
Editing Receipts, Date Due Slips, Hold Slips, etc.
Wizards Where There Are Payment Receipts-
- Billing a User
- Checkout
- Checkin
- Display User
- Fine Free Checkin
- Paying bills
- Place Blanket Hold
- Renew Item
- Renew User
Wizards Where There are Transit Slips-
- Check Item Status
- Checkin
- Bookdrop Checkin
- Fine Free Checkin
- Onshelf Items
- Remove User Hold
- Trap Holds
Wizards Where There Are Credit Receipts-
- Credit User Account
Note:With any receipt or slip changes, you do still have the option to email SEO support@servingeveryohioan.org or create a ticket on the https://support.servingeveryohioan.org website to request changes. SEO can make these changes globally so that they will reflect on all of your workstations.